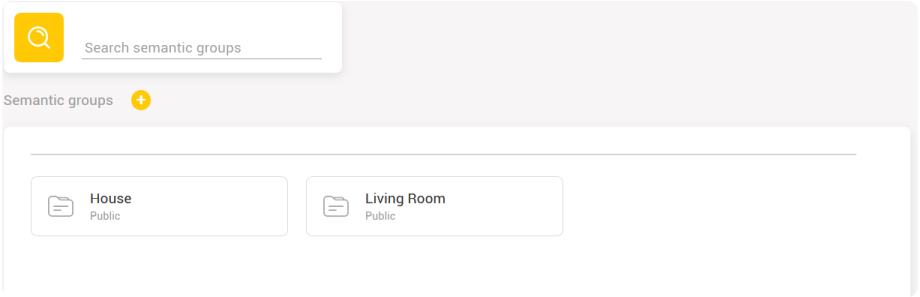
Create Semantic Group
There are four ways in which you can create semantic group depending on a template:
1. Create new template while creating semantic group
- Click on Create group button in Data Semantics tab
- Click on Create template link
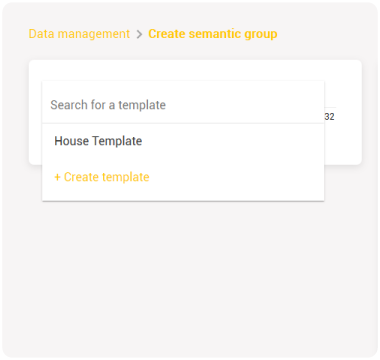
- You will immediately get all the prompts necessary to make a template
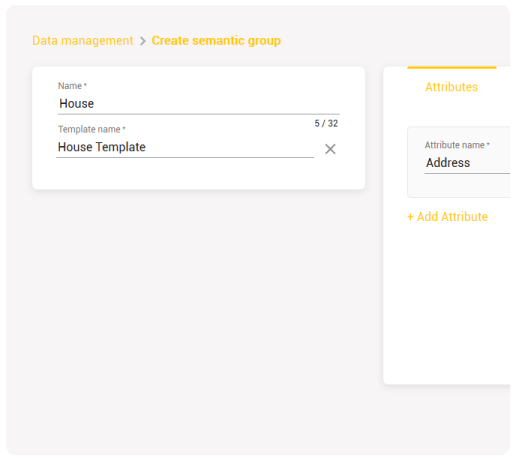
- Enter name for your template
- Continue by adding Attribute - provides additional information about the semantic group
- Choose Attribute type
- If you check Attribute required box, value text box will be mandatory for all Attribute types

- If numeric - enter number as value
- If string - enter text as value
- If boolean - check value box
- If location - enter coordinates as value
- You can add multiple number of Attributes
- Continue by adding placeholder for Sensor’s feed
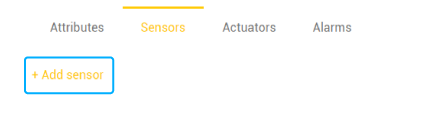
- Go to Sensors tab
- Click on Add sensor link
- In new text field enter Sensor name, Reading type and Unit
- Now that you created a placeholder, click on Map data button to map sensor’s feed to the placeholder
- New window will pop up with the list of all the sensors’s feeds that can be mapped (have the same Reading type and Unit)
- Choose the feed
- Click Save
- You can add multiple number of feeds
- Continue by adding placeholder for Actuator
- Go to Actuators tab
- Click on Add actuator link
- In new text filed enter Actuator name and Reading type
- Please note that you should only choose reading types which are marked as actuators
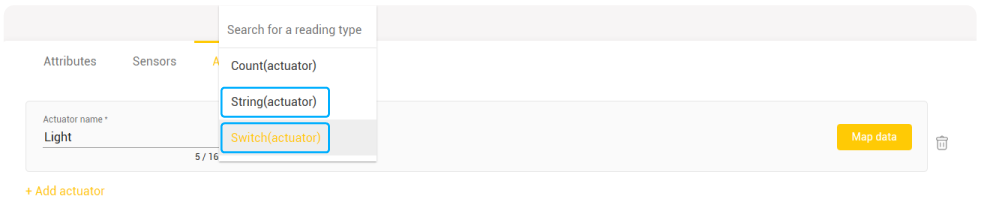
- Now that you created a placeholder, click on Map data button to map actuator to the placeholder
- New window will pop up with the list of all the actuators that can be mapped (have the same Reading type and Unit)
- Choose the actuator
- Click Save
- You can add multiple number of actuators
- Continue by adding placeholder for Alarm
- Go to Alarms tab
- Click on Add alarm link
- In new text field enter Alarm name

- Now that you created a placeholder, click on Map data button to map alarm to the placeholder
- New window will pop up with the list of all the alarms
- Choose the alarm
- Click Save
- You can add multiple number of alarms
- Now that you have created the template and the semantic group, click Save to finalise the process
- Semantic group will appear in Data Semantics tab in Semantic groups field
- Template you created will appear in Templates tab
- Now you can continue with making your semantic group
2. Create template separately and then create semantic group
- Go to Templates tab
- Click on
 button to create new semantic group template
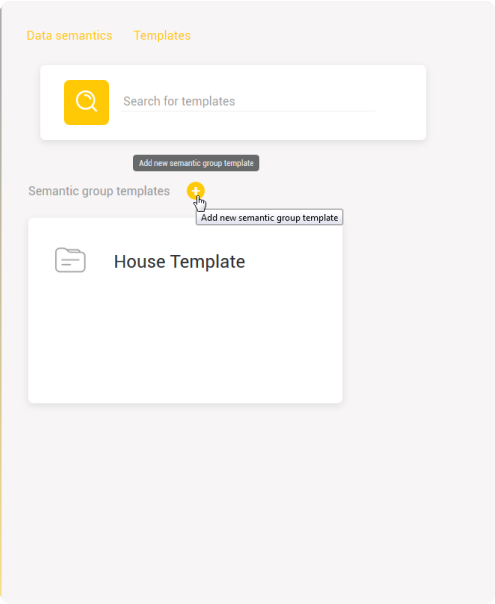
- You will jump to Create templates screen
- Create template as previously described
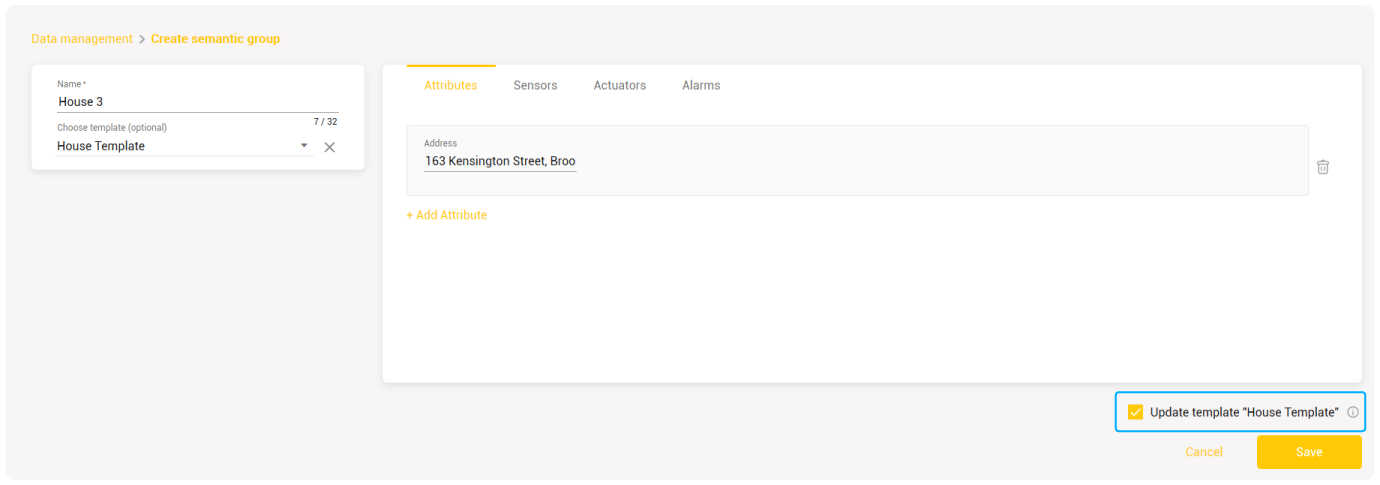
3. Choose template from those already created
- This will automatically generate all the placeholders for Attributes/Sensors’ feeds/Actuators/Alarms you have created with a template
- To continue the process, check Update template ‘[name]‘ box
- Click Save and finalise the process of creating a semantic group
- Semantic group will appear in Data Semantics tab in Semantic groups field
4. Create semantic group without creating template
- Go to button and start creating semantic group as described in the beginning of this section
- Skip choosing template or creating new template steps
- Create your semantic group by adding any Attribute/Sensor/Actuator/Alarm
- Click Create to complete the process
- Your semantic group will be created and listed in the Semantic groups tab
Modify Semantic Group
You can modify semantic group in various ways:
- Edit
- Move to
- Move to first level
- Delete
Edit Semantic Group
To edit semantic group:
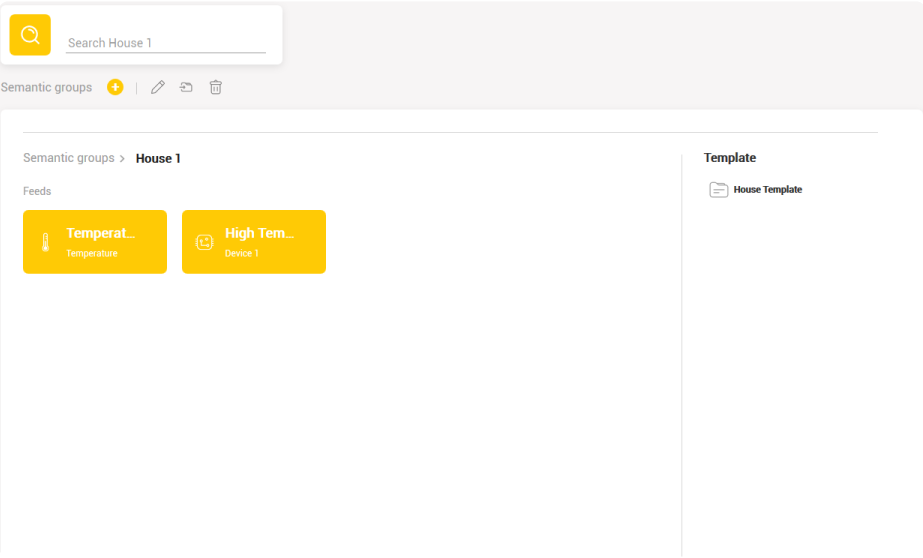
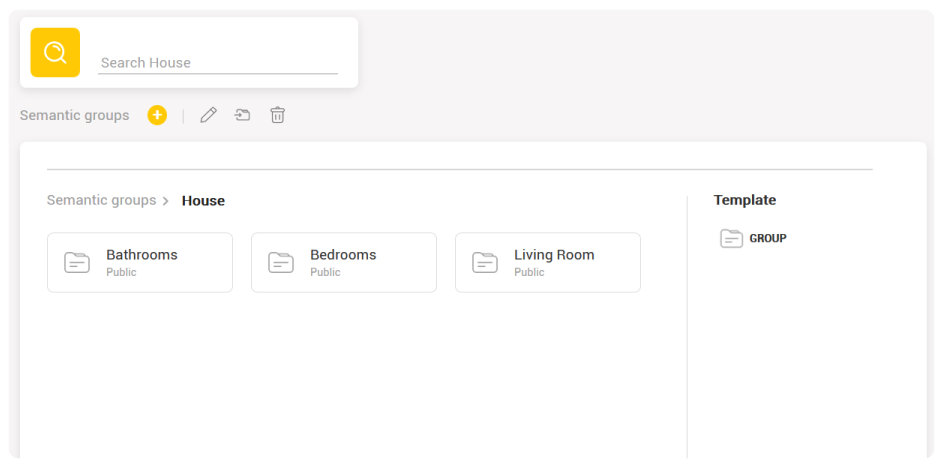
- Click on a semantic group tile
- You will jump to the box that contains tiles of feeds/actuators/semantic subgroups
- Click on Edit group button above the box
- New window will pop up with Info and Access tab
Info tab contains text file in which you can modify the name of the (sub)group
- You can also Add attribute, Cancel and Update the changes you made
- Access tab enables you to modify the access to your semantic (sub)groups and the data it contains
- Click on Edit group button
- New window will pop up with Info tab
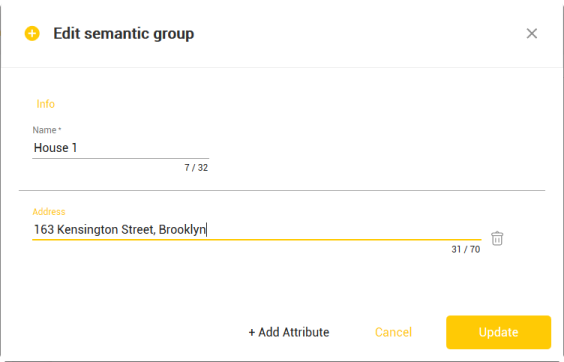
In Info tab you can edit group’s attribute or even add some new ones.
Move to
Move to option in semantic group screen enables you to move the semantic GROUP in question to another semantic group and make it a SUBGROUP.
To do so:
- Click on Move to button
- New widow will pop up with the list of all the semantic groups you created/have the access to

- Choose the semantic group
- Click Save
- Your semantic group is now a subgroup of the group you have chosen
Move to First Level
Move to First Level option allows you to move semantic SUBGROUP to the first level and make it a first level semantic GROUP.
To do so:
- Click on Move to first level button
- You will jump to the screen with first level semantic groups
Delete Semantic Group
To delete semantic (sub)group:
- Go to Delete group button
Please note that if you delete semantic group, all of its data, including subgroups will be deleted as well.


