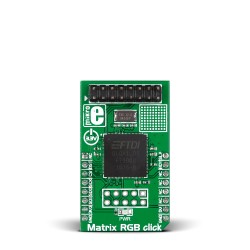
Almost one year has passed since we released the Matrix RGB click board. That click board became without a doubt one of the most popular ones we have. The wide range of possibilities and easy usage are probably the main reason for its high popularity.
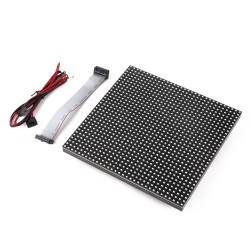
On the recently held Embedded World fair, the Matrix RGB click board found another usage in the NFC demo application. The whole application tracked a lot of attention there, but in this article we will only pay attention to RGB panel part.
For this event, an optimized version of firmware was developed especially for 2x2 panel size.

http://github.com/MikroElektronika/Martix_RGB_2x2
Take a look at the video from the Embedded World, featuring a smart factory demo on NXP's booth:
Firmware
When compared to the previous version of the firmware, this one is quite simple. Your application is placed on an external MCU. The FT900 placed on the click board™ is only in charge of panel control. The firmware is capable of displaying 64 colors, which is enough for this particular task. Scrolling is fast and smooth but limited to one scroll step per 10 ms. Another great thing is that there is no more flickering. Text processing is now a job for your application, which allows you to chose the needed font size.
A new feature of the updated version of firmware is that it can work standalone. You can check the firmware directory in the GitHub repository and try your own scenario. The new version is also capable of storing 30 images which can be displayed by request from the external MCU or by implementing your own scenario inside the firmware.
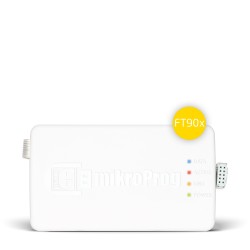
Don't forget that FT90x mikroProg is needed if you decide to work with Matrix RGB click as a standalone application.
Application
The application can be placed on any MCU which has enough RAM to drive the display. Approximately 2kB of RAM is enough to drive the new firmware. Our GitHub repository already contains two examples for Hexiwear and FT900 placed on clicker 2 board as external MCU which carries our application. There is almost no difference, so whatever MCU you choose your code might look like this:
#include "image.h"
#include "matrix_rgb_hw.h"

sbit MATRIXRGB_CS       at PTC_PDOR.B4;
sbit MATRIXRGB_READY    at PTB_PDIR.B13;
sbit MATRIXRGB_RST      at PTB_PDOR.B11;

void main()
{
    uint8_t rep;
    uint8_t blinks;
    uint8_t intens;

    GPIO_Digital_Output( &PTC_PDOR, _GPIO_PINMASK_4 );
    GPIO_Digital_Output( &PTB_PDOR, _GPIO_PINMASK_13 );
    GPIO_Digital_Input( &PTB_PDIR, _GPIO_PINMASK_11 ); // Set Reset pin to output

    MATRIXRGB_RST = 0;
    Delay_ms(20);
    MATRIXRGB_RST = 1;
    Delay_ms(200);

    SPI0_Init_Advanced( 4000000, _SPI_CFG_MASTER | _SPI_CFG_SELECT_CTAR0 |
                        _SPI_CFG_FRAME_SIZE_8BITS | _SPI_CFG_CLK_IDLE_LOW |
                        _SPI_CFG_CLK_PHASE_CAPT_LEADING | _SPI_CFG_MSB_FIRST,
                        &_GPIO_Module_SPI0_PC5_7_6 );

    MATRIXRGB_CS = 1;
    Delay_ms( 2000 );
    matrixrgb_init();

    // IMAGE FROM FLASH TEST
    matrixrgb_cmd( RGB_IMG_LOAD, 2 );
    Delay_ms( 1000 );

    // BRIGHTNESS TEST
    matrixrgb_cmd( RGB_BRIGHTNESS, 5 );
    Delay_ms( 1000 );
    matrixrgb_cmd( RGB_BRIGHTNESS, 50 );
    Delay_ms( 1000 );
    matrixrgb_cmd( RGB_BRIGHTNESS, 100 );
    Delay_ms( 1000 );
    matrixrgb_cmd( RGB_BRIGHTNESS, 5 );

    // POWER TEST
    matrixrgb_cmd( RGB_POWER, 0 );
    Delay_ms( 1000 );
    matrixrgb_cmd( RGB_POWER, 1 );
    Delay_ms( 1000 );

    // FILL SCREEN AND PIXEL TEST
    matrixrgb_fill( 0x1234 );
    Delay_ms( 1000 );
    matrixrgb_fill( 0xF8A1 );
    Delay_ms( 1000 );
    matrixrgb_fill( 0x0000 );
    Delay_ms( 500 );
    matrixrgb_dot(  0,  0, 0xF100 );
    matrixrgb_dot(  0, 20, 0x07E0 );
    matrixrgb_dot(  0, 40, 0x001F );
    matrixrgb_dot( 63, 63, 0xF100 );
    matrixrgb_dot( 15,  0, 0x07E0 );
    matrixrgb_dot( 25, 40, 0x001F );
    matrixrgb_dot( 50, 20, 0xF100 );
    matrixrgb_dot( 30, 63, 0x07E0 );
    matrixrgb_dot( 41, 25, 0x001F );
    Delay_ms( 2000 );

    // IMAGE UPLOAD TEST
    matrixrgb_img( elogo4x4_bmp );
    Delay_ms( 2000 );

    // DYNAMIC IMAGE SCROLL
    while( 1 )
    {
        matrixrgb_img_scroll( NXP_logo_bmp, DIR_UP, SPEED_FAST );
        matrixrgb_img_scroll( NXP_logo_bmp, DIR_DOWN, SPEED_MEDIUM );
        matrixrgb_img_scroll( NXP_logo_bmp, DIR_LEFT, SPEED_SLOW );
        matrixrgb_img_scroll( NXP_logo_bmp, DIR_RIGHT, SPEED_FAST );
    }
}
The code above is actually the test code which shows us how to use each function from the library. In addition to these functions from the code, there are a few more rather useful functions:
- void matrixrgb_text( char *text, uint16_t x, uint16_t y )
- void matrixrgb_img_scroll_in( uint8_t *img, scroll_dir_t direction, scroll_speed_t speed );
- void matirxrgb_scroll_out( scroll_dir_t direction, scroll_speed_t speed );
Keep in mind that before the usage of matrixrgb_text you have to setup the font by calling matrixrgb_set_font .
Summary
A 2x2 panel size is more than enough to make an advertising panel for your shop or anything else you have in mind. The library makes it simple to create an application, so you will not have to spend a lot of time making your own. What might be your main task is building a frame that is good enough to hold 4 panels ordered in a 2x2 manner.
It is very important to note that the power consumption, when very bright pictures are used, goes above 4 amps per panel, so a good power supply is a must.


