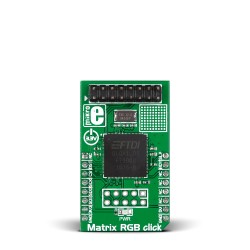
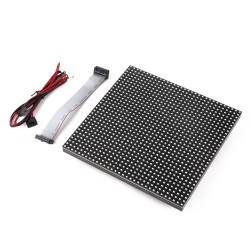
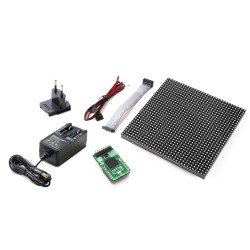
Today, let's talk about LED Matrices with MikroElektronikas' MatrixRGB Click. The Click is designed to take the load off of the host MCU and make driving a matrices with ease. Whether it be a single pixel with a color, text displayed at any point on the screen, or an RGB 565 formatted bitmap, it is all made simple with our library.
How The Panels Work
Panels are connected to the click with 16 wires. To better explain how each wire works, here is a picture of the connection...

Panels are driven by shift registers. There are 9 shift registers for driving LED colors and row selections effectively, along with 3 pins to latch, clock and enable leds. There are 2 for each color, 3 for row selection( A, B, C ), clock pin ( CLK ), latch pin ( STB ), and a OE / enable pin. Top row color shift registers are labeled R1, G1 and B1, while bottom row color registers are labeled R2, G2 and B2. Row selection registers are used to make re-writes appear more fluent. While your row selection is set to row 0, row 8 will also be updated. Shifting data onto R1, B1 and G1, will update row 0 data, and R2, B2, and G2 will update row 8. Here is a peak at refresh() used in our library...
void refresh( void )
{
     uint8_t j, i;
     uint16_t p;

     reset_row();    // Resets row position to 0

     for( i = 0, j = 8; i < 8; i++, j++ )
     {
        Latch_Off();
        for( p = 0; p < shift_reg; p++ )
        {
             Led_Matrix_Data = 0;
             Led_Matrix_Data |= ( FB[( shift_reg * j ) + p] & 4 ) << 1;
             Led_Matrix_Data |= ( FB[( shift_reg * j ) + p] & 2 ) << 3;
             Led_Matrix_Data |= ( FB[( shift_reg * j ) + p] & 1 ) << 5;
             Led_Matrix_Data |= ( FB[( shift_reg * i ) + p] & 4 ) >> 2;
             Led_Matrix_Data |= ( FB[( shift_reg * i ) + p] & 2 );
             Led_Matrix_Data |= ( FB[( shift_reg * i ) + p] & 1 ) << 2;
             Clk_Toggle();
        }
        Latch_On();
        inc_row();
     }
}
First, we must reset the row to 0. Our loop is set to loop 8 times, completely taking care of all 16 possible rows of data. Before loading Led_Matrix_Data with R1, R2, G1, G2, B1 and B2 data, Latch pin must be set to 0 or deasserted. The inner loop is set to increment until it reaches shift_reg, which is dependent on how many panels the library is initialized with. If it is initialized with a width of 2 panels and a height of 1 panel, then shift reg = ( width * height ) * 64 for 32x32 panels and shift reg = ( width * height ) * 32 for 16x32 panels, because a single shift register for a panel is 64 or 32 bytes for one entire panel. ( We will go into more on how multiple panels work later ). Next, data from the frame buffer with a format of 0b00000RGB is placed onto Led_Matrix_Data and our clock is then toggled which shifts this data onto the display( if 565 bitmap is being used, format will be parsed and put together again into 0b00000RGB format). After a pair of rows is finished ( row ? and row ? + 8 ), Latch pin is asserted, and row is incremented.
Multiple Panels
A single panel is really cool and easy to run, but so is multiple panels! To run multiple panels, all that has to happen is proper initialization, and connecting multiple panels together in a correct order.

Initialization is very simple and only takes 3 arguments, width, height and panel size. Width and height are not pixels, they are how many 32x32 or 16x32 panels in width and height that are connected. Panel size can be either "BIG_PANEL" which means 32x32 panel, or "SMALL_PANEL" which means 16x32 panel. Pretty simple! Lastly, connecting must be done correctly for the library to know what you mean when writing a pixel or drawing to "( 0, 0 )".
How To Connect Panels
To connect multiple panels together, always connect starting from the bottom right-most corner to the top-left most corner. If your display only has 1 panel in height you can simply align the panels right to left with the right-most panel connected to the click. Otherwise, your connections should go from panel 1 to 2, 2 to 3, and 3 to 4. This way, when you initialize your display for a width and height of 2 panels, the coordinates you send will be positioned correctly on your display.

For 16x32 panels you will need to connect two 16x32 panels together from bottom to top, and follow the pattern as stated above. For example, using 16x32 panels with a width of 2 and a height of 2 would be connected like so...

Also note that when connecting to the Matrix RGB Click, red wire on the strip must be on the same side as the arrow that is on the click.

Power
To power panels, you must use a 5v power supply, with 3 amps per panel that you plan to use for your display. This is an example of a power supply used for 1 RGB 32x32 panel or 2 16x32 panels.

How To Use Matrix RGB Library
MatrixRGB Click library allows you to write text to any starting coordinate on your display, manually refresh and clear your display, write to individual pixels, load RGB 565 formatted bitmaps, and much more. The library can be found on Libstock or Github at this link...
Here is a small example on ARM of how to use the Matrix RGB to drive one 32x32 panel, and play a little bit of our version of "Breakout".
Setup
First, lets start out with an easy setup...
sbit MATRIXRGB_CS    at GPIOD_ODR.B13;
sbit MATRIXRGB_READY at GPIOD_IDR.B10;
sbit MATRIXRGB_RST   at GPIOC_ODR.B2;

void system_setup( uint8_t width, uint8_t height, panel_size_t panel_size )
{

    GPIO_Digital_Output( &GPIOD_BASE, _GPIO_PINMASK_13); // Set Chip Select pin as output
    GPIO_Digital_Output( &GPIOC_BASE, _GPIO_PINMASK_2 ); // Set Reset pin to output
    GPIO_Digital_Input( &GPIOD_BASE, _GPIO_PINMASK_10);  // Set Ready to input

    // Initialize SPI
    SPI3_Init_Advanced(_SPI_FPCLK_DIV2, _SPI_MASTER | _SPI_8_BIT |
                       _SPI_CLK_IDLE_LOW | _SPI_FIRST_CLK_EDGE_TRANSITION |
                       _SPI_MSB_FIRST | _SPI_SS_DISABLE | _SPI_SSM_DISABLE | _SPI_SSI_1,
                       &_GPIO_MODULE_SPI3_PC10_11_12);

    MATRIXRGB_RST = 0;        //Reset slave ( toggle )
    Delay_ms(20);
    MATRIXRGB_RST = 1;
    Delay_ms(200);

    matrixrgb_init( width, height, panel_size );
    Delay_ms(200);

}
Main
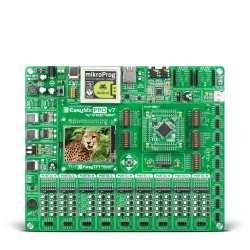
This setup function sets up GPIOs for chip select, reset, and ready pin. Ready pin is used by firmware on the FT900 to tell our host MCU when it is ready for data transmission. Next, SPI communication is setup for MikroBus 1 on the EasyMxPro V7. After initializing host MCU side peripherals, the Matrix is reset using MATRIXRGB_RST pin, and then initialized with a width, height and panel size where BIG_PANEL means 32x32, and SMALL_PANEL means 16x32 with matrixrgb_init(). Let's take a look at some functions...
system_setup( 1, 1, BIG_PANEL );
Here, a display is set up for a width of 1 and a height of 1 using 32x32 panels. About 200 ms after setup, the Matrix is ready for use.
color_t my_color;

matrixrgb_scroll_img_right( MikroeBITMAP_bmp, 64, 16, 25 );
matrixrgb_scroll_off_scrn_down( 25 );
matrixrgb_set_color( &my_color, 1, 1, 1 );
matrixrgb_scroll_text_left( "Matrix ", my_color, 17, 10 );
The first function, matrixrgb_scroll_img_right() takes a bitmap, width in pixels, height in pixels, and speed at which an image should be scrolled right across a display. After the scrolling text animation, matrixrgb_scroll_off_scrn_down() is used to scroll an entire frame buffer off of the display at a speed given. Provided is a struct called color_t that is used to send any color you want things to be. First we make a color_t called my_color, so that later on we can use matrixrgb_set_color() to set any color we want, and use it in other functions. Finally, we call matrixrgb_scroll_text_left(). To use matrixrgb_scroll_text_left() we send text we'd like to display, along with a color, speed and length of a string you'd like to display.
Note: During scrolling the display is refreshed by the click itself, otherwise the host must use matrixrgb_refresh().
MCU To Click Communication
One function not mentioned in this example is matrixrgb_write_text(). Let's look at how it is implemented and get a peak at how firmware works...
void matrixrgb_write_text( char *text, color_t color, uint8_t text_size, uint8_t start_row, uint8_t start_col )
{
    uint8_t i = 0;
    uint8_t *ptr = text;

    spi_buffer[0] = WRITE_TEXT_CMD;
    matrixrgb_hal_write( &spi_buffer, 1 );
    spi_buffer[0] = text_size;
    matrixrgb_hal_write( &spi_buffer, 1 );
    spi_buffer[0] = color.red;
    spi_buffer[1] = color.green;
    spi_buffer[2] = color.blue;
    matrixrgb_hal_write( &spi_buffer, 3 );
    spi_buffer[0] = start_row;
    spi_buffer[1] = start_col;
    matrixrgb_hal_write( &spi_buffer, 2 );

    for( i = 0; i < text_size; i++ )
    {
        spi_buffer[0] = *ptr++;
        matrixrgb_hal_write( &spi_buffer, 1 );
    }
}
This function first sends the command through SPI to the FT900 SPI slave to alert the firmware to get ready for a text size, color, start row, start column, and then finally data. It does this by filling a buffer with data it would like to send and waiting for the ready pin to be held high and then sending data. Next, Matrix RGB firmware gets the first command byte, and enters its' own "write_text" function to receive data in the same order it was sent, and then performing an action based on data received.
Note: Start row and start column of text is the top left corner of the first letter in the string.
Draw A Picture
Using a combination of Windows Paint and our Visual TFT program, you can create pictures to be displayed! First let's start with Paint, and how to make sure your environment is set up for drawing correctly. First, find out a width and height in pixels of the image you'd like to draw. Here is a screenshot of a paint environment set up to draw a 32x32 bitmap...

Canvas size has been changed to be 32 x 32px and can now be drawn on. To save correctly for using in Visual TFT, you must save it as a BMP picture like this...

Now that you have a bitmap of an image you'd like to display, open Visual TFT and start a new project. It will prompt you for a platform you are using, and after that you will need to add an image resource and load your image from a file like this...

After adding an image, click generate code at the top of your screen in Visual TFT, and navigate to your project_name_resources.c and project_name_resources.h to find code almost ready for implementation. Lastly, change the type from const code char to uint8_t, and adding these two files to your project!
Summary
To make using our Matrix RGB easy, we provide a great library, without a heavy setup or large processing load for your host MCU. SPI communication is used to tell a FT900 what to do, and it takes it from there. It can be used for bitmap pictures, scrolling text or non-moving text, drawings, or even a cool debugging tool if you'd like!


