


The world of microcontrollers is vast and diverse. Among the many options available, the ESP32 board stands out.
This powerful and versatile microcontroller has gained popularity among hobbyists and professionals alike. It's not hard to see why.
The ESP32 board boasts a dual-core processor, Wi-Fi and Bluetooth capabilities, and low power consumption. These features make it an ideal choice for a wide range of projects, from home automation to wearable tech.
But how do you get started with the ESP32 board? What do you need to know before you make a purchase? And once you have your board, how do you set it up and start programming?
This guide will answer all these questions and more. Whether you're a beginner or an experienced developer, you'll find valuable insights and practical advice to help you make the most of the ESP32 board.
Introduction
What is ESP32?
The ESP32 is a microcontroller developed by Espressif Systems. It is renowned for its versatility and powerful features.
At its core, the ESP32 integrates both a microcontroller and a wireless transceiver. This allows it to support Wi-Fi and Bluetooth connectivity, setting it apart from many other microcontrollers.
Its dual-core processor enables high-performance computing. This makes it ideal for tasks that require complex data processing. The ESP32 is well-suited for Internet of Things (IoT) applications.
Its energy-efficient design ensures long battery life, even for power-sensitive projects. In essence, the ESP32 serves as a robust platform for developers and engineers aiming to build connected and intelligent devices.
With countless resources available, it appeals to beginners as well as seasoned professionals seeking to implement innovative solutions.
Overview of ESP32 Microcontroller
The ESP32 microcontroller offers a range of impressive features. It consists of dual-core Xtensa LX6 processors, which provide ample processing power for demanding applications.
The ESP32 supports Wi-Fi 802.11b/g/n standards and Bluetooth 4.2, including Bluetooth Low Energy (BLE). This connectivity makes it a favorite for projects requiring network capability.
A significant benefit of the ESP32 is its low power consumption mode. This feature is crucial for devices intended to run on battery for extended periods.
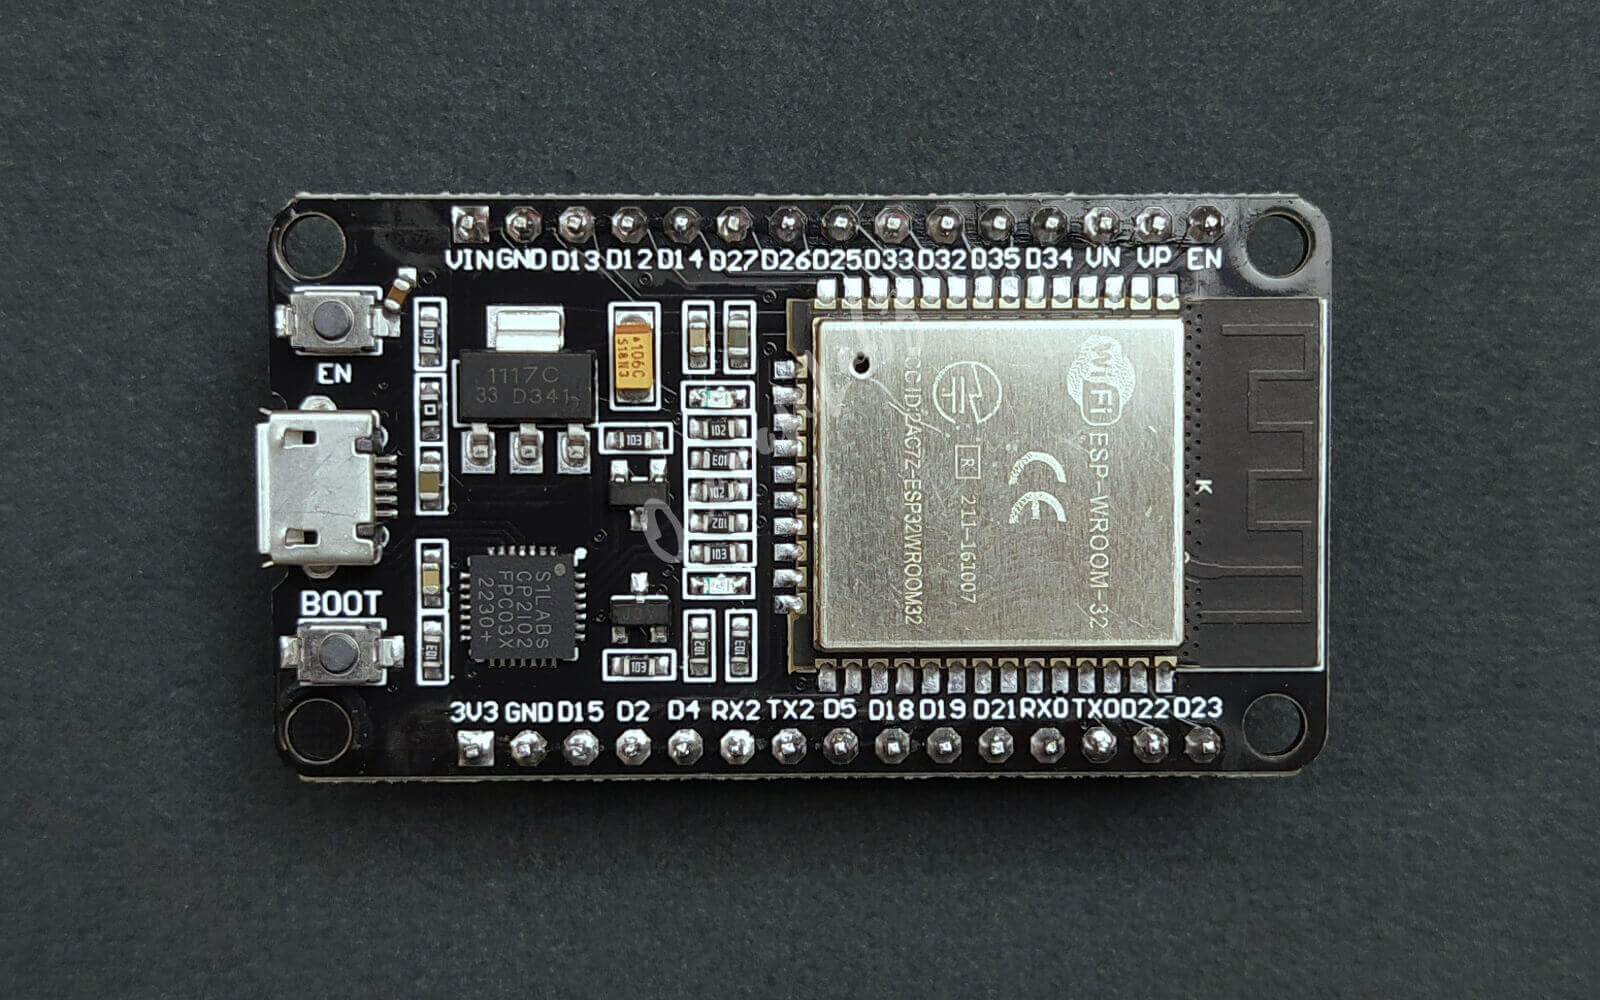
The microcontroller includes many GPIO pins, enhancing its ability to connect with various peripherals and sensors. Key interfaces supported by the ESP32 include SPI, I2C, and UART. The board has both digital and analog pins, allowing for more versatile use in projects. In addition to connectivity and interface support, the ESP32 microcontroller incorporates security features like secure boot and flash encryption.
This ensures data integrity and privacy for both developers and end users. The ESP32 also comes with a host of libraries and development tools, making programming straightforward. Common programming environments include the Arduino IDE and the ESP-IDF, which is Espressif's IoT development framework. A robust community of developers offers support, contributing to the ESP32's rich ecosystem.
Applications of ESP32
The versatility of the ESP32 allows for an array of applications. Its most notable use is in IoT projects, where reliable wireless connectivity is a must.
Home automation is another significant domain where the ESP32 excels. Devices like smart lights, thermostats, and security cameras often rely on its capabilities.
In wearable technology, the ESP32's low power consumption is a significant advantage. It powers devices such as fitness trackers and smartwatches, providing connectivity without frequent charging.
Education is another field where the ESP32 finds substantial application. It serves as a learning tool for students exploring programming and electronics.
In terms of its integration capabilities, here are some examples of ESP32 applications:
- Smart home systems
- Environmental monitoring systems
- Industrial automation
These applications leverage the board's ability to handle various sensors and interfaces. The adaptability of the ESP32 ensures its presence across different sectors, both in prototype and finished product stages.
ESP32 Features
Dual-Core Processing
The ESP32 stands out with its dual-core processing capabilities. Each of its cores can run independently or in conjunction, allowing for more efficient multitasking.
This feature is essential for tasks that require handling multiple processes simultaneously. As a result, applications can run more smoothly and responsively.
The dual-core architecture significantly enhances the ESP32's performance. It can handle complex algorithms and data-intensive tasks with ease.
This makes the ESP32 a suitable choice for projects requiring high computational power, such as multimedia processing or real-time data analytics. By distributing tasks between the two cores, developers can optimize performance efficiently.
WiFi and Bluetooth Capabilities
One of the most attractive features of the ESP32 is its robust connectivity options. It supports both WiFi and Bluetooth, including Bluetooth Low Energy (BLE).
This dual capability opens up a wide range of possibilities for IoT applications. Devices can connect to networks, exchange data, and interact with other smart gadgets seamlessly.
WiFi connectivity enables the ESP32 to connect to a wide area network, ideal for smart homes and remote data collection. Meanwhile, Bluetooth allows for low-power, short-range communication, perfect for wearables and sensor networks.
By supporting both WiFi and Bluetooth, the ESP32 offers flexibility for developers to choose the best communication method for their project needs. This interoperability is crucial for creating versatile and scalable applications.
GPIO and Peripheral Interfaces
The ESP32 comes equipped with multiple GPIO (General Purpose Input/Output) pins, essential for connecting various devices and sensors. These pins allow developers to interface the ESP32 with a wide array of peripherals.
Notably, the ESP32 supports popular communication protocols such as SPI, I2C, and UART. These protocols are vital for integrating the board with different components, from displays to sensors.
Beyond simple inputs and outputs, some GPIO pins are capable of specific functions, such as PWM (Pulse Width Modulation) for motor control. This versatility is a key advantage for projects ranging from robotics to smart lighting solutions.
Additionally, the ESP32 supports analog inputs, thanks to its analog-to-digital converters (ADCs). This feature enables the board to read data from analog sensors, such as temperature or light sensors.
The following interfaces contribute to the ESP32's flexibility in connecting with external devices:
- SPI (Serial Peripheral Interface)
- I2C (Inter-Integrated Circuit)
- UART (Universal Asynchronous Receiver-Transmitter)
These capabilities allow the ESP32 to cater to a broad spectrum of projects, from simple sensor readings to complex communication networks. Overall, the GPIO and peripheral support make the ESP32 an integral part of electronics development.
Choosing the Right ESP32 Development Board
Factors to Consider
Selecting the right ESP32 development board is crucial to the success of your project. It's important to consider various factors to ensure compatibility with your project's needs.
Firstly, determine the specific requirements of your project, such as size constraints or required features. If your project involves compact devices, a smaller board like the ESP32 mini dev board might be ideal.
Consider the available GPIO pins and peripheral interfaces offered by the board. Projects requiring multiple connections or advanced communication protocols should prioritize a board with sufficient connectivity options.
Here are key factors to evaluate when choosing an ESP32 dev board:
- Project size constraints and form factor
- Required GPIO pins and peripheral interfaces
- Power consumption and battery life
- Budget considerations
By understanding your project's demands, you can choose a board that best suits your goals and ensures optimal performance.
Popular ESP32 Dev Boards
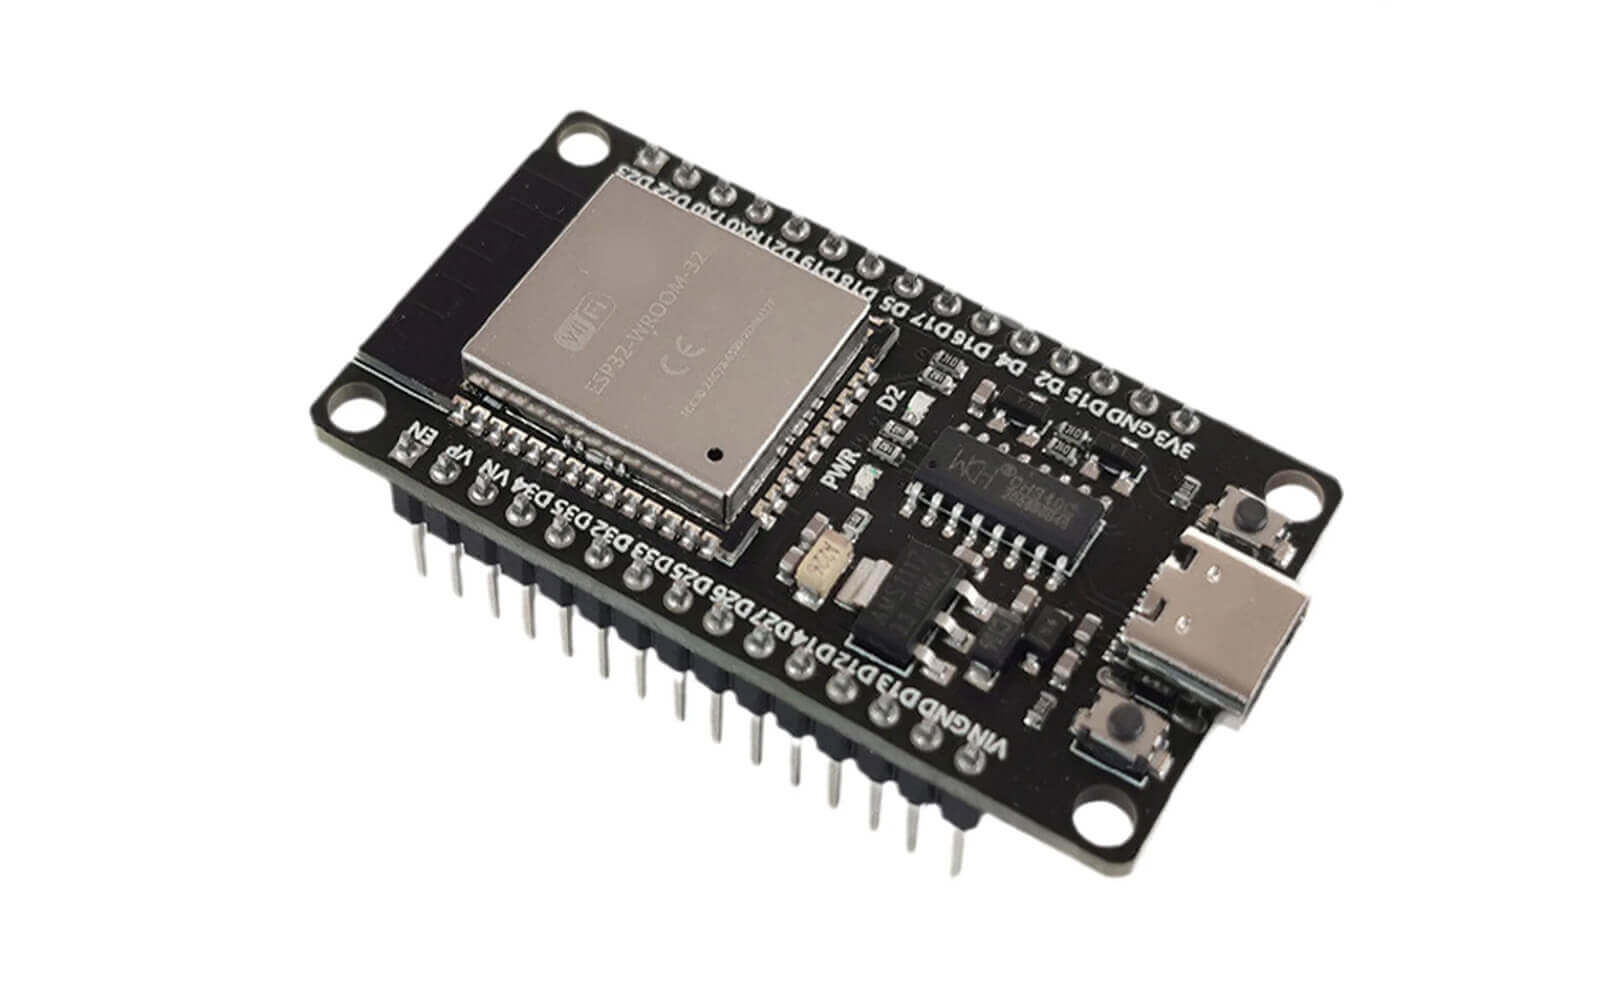
The market offers various ESP32 development boards, each catering to different needs and applications. The ESP32-WROOM, for instance, is a popular choice due to its balanced features and affordability.
For projects requiring more advanced capabilities, the ESP32-S2 board is an excellent option. It offers enhanced security features and additional peripherals to accommodate complex applications.
The ESP32-CAM is ideal for camera-based projects. This board integrates a camera module, making it suitable for surveillance, photography, or smart vision applications.
For developers focusing on audio processing, the ESP32-LyraT board provides comprehensive support. It includes audio input/output interfaces, making it perfect for voice recognition or streaming tasks.
Here's a list of some popular ESP32 development boards:
- ESP32-WROOM: Balanced features, cost-effective
- ESP32-S2: Enhanced security, additional peripherals
- ESP32-CAM: Built-in camera module, visual applications
- ESP32-LyraT: Audio input/output for audio processing
By reviewing each board's specifications and features, you can identify the one that aligns with your project's unique requirements. This ensures a smooth development process and helps you achieve the desired outcome.
Setting Up the ESP32 Development Kit
Installing the Necessary Software
Before diving into projects with the ESP32 development kit, installing the necessary software is crucial. This ensures a smooth programming experience and proper functionality of the board.
The first step is to download and install the Arduino IDE, which is widely used for programming ESP32 boards. Visit the official Arduino website and select the version compatible with your operating system.
Once installed, you'll need to configure the IDE to recognize the ESP32 board. Open the IDE, go to File > Preferences, and add the URL for the ESP32 board support in the "Additional Board Manager URLs" field.
Next, navigate to Tools > Board > Board Manager, and search for "ESP32." Install the package from Espressif Systems, which will provide the necessary libraries and support for ESP32.
Here's a quick list of installation steps:
- Download and install the Arduino IDE.
- Add the ESP32 board URL in Preferences.
- Open Board Manager and search "ESP32".
- Install the package by Espressif Systems.
Following these steps ensures your IDE is ready for ESP32 development, allowing you to program and upload code seamlessly.
Connecting the ESP32 Dev Kit
Once the software is set up, connecting your ESP32 development kit to your computer is the next step. This allows for code uploading and testing of your projects.
Start by using a USB cable to connect the ESP32 dev board to your computer. Ensure the cable is compatible with data transfer, not just charging, to establish a successful connection.
After connecting the board, you should see the power LED on the board light up, indicating it's ready for use. If the LED doesn't light, verify the cable and connections.
In the Arduino IDE, select your ESP32 board from Tools > Board. Also, set the correct COM port under Tools > Port to ensure the board communicates properly with your computer.
This simple process prepares your ESP32 development kit for programming, enabling you to begin writing and testing exciting projects. By ensuring these connections and settings are accurate, you set the foundation for a smooth development experience.
Programming the ESP32
Using Arduino IDE
Programming the ESP32 with the Arduino IDE is a straightforward process. The IDE provides a user-friendly environment, ideal for beginners and experts alike. To begin, open the Arduino IDE and create a new sketch.
Select your ESP32 board and the correct COM port from the Tools menu. This ensures your code uploads to the right device. Start by writing a simple program, such as blinking an LED, to familiarize yourself with the system.
In the setup function, initialize the serial monitor at 115200 baud to observe outputs. Then, in the loop function, add code to toggle the LED state. This basic example demonstrates how functions work within a sketch.
Uploading your code is easy: click the upload button in the IDE. The status bar will indicate the progress and notify you upon completion. If issues arise, check your connections and board settings.
Here’s a quick checklist for successful programming:
- Open a new Arduino sketch.
- Select the correct board and COM port.
- Write and verify your code.
- Use the upload button to transfer code to the ESP32.
Following these steps helps you execute and test projects efficiently with the Arduino IDE, establishing a foundation for more complex applications.
Sample Projects
Exploring sample projects is an excellent way to grasp the versatility of the ESP32. From simple applications to complex systems, there is a wide range to consider. Start with a basic project, like building a temperature monitor.
For this, you can use a sensor to read environmental data. Display the results using the serial monitor or an attached display. This project integrates hardware and software aspects, providing valuable learning experiences.
Another exciting project involves creating a web server with the ESP32. By connecting it to WiFi, the ESP32 can host a simple webpage, allowing remote control or monitoring.
Consider experimenting with a motion detector system, which uses the ESP32's GPIO pins for input/output operations. This system can activate LEDs or buzzers when motion is detected. Here’s a brief list of projects to explore:
- Temperature monitor with a sensor.
- Hosting a web server on ESP32.
- Simple motion detection system.
These sample projects highlight the ESP32's capabilities and encourage experimentation. Engaging with such projects helps build practical skills and expands your understanding of what the ESP32 can accomplish.
Pricing
ESP32 Chip Price Comparison
The ESP32 chip is known for its competitive pricing, making it popular among developers. Prices can vary based on the model and features offered. Typically, ESP32 chips range from $5 to $10, depending on the specifications.
For instance, the basic ESP32-WROOM module is at the lower end of the price range. In contrast, models with enhanced features, like the ESP32-S3, can cost slightly more. Some development kits, with additional components or sensors, may command higher prices.
When comparing prices, consider factors like memory capacity and additional communication protocols. Here’s a brief list of typical pricing ranges:
- ESP32-WROOM: around $5
- ESP32-S2 modules: about $7
- Advanced models, like ESP32-S3: $10 or more
Understanding these price differences helps make informed purchasing decisions based on your project needs and budget.
Conclusion
Summary of ESP32 Benefits
The ESP32 board stands out for its dual-core processing and diverse communication protocols. Its integrated WiFi and Bluetooth make it ideal for IoT projects. Developers appreciate the board's adaptability, from simple hobbyist tasks to complex industrial applications.
The ESP32’s low cost and robust capabilities enhance its appeal for beginners and experts alike. Its versatility in integrating with various sensors and peripherals ensures extensive use cases, making it a preferred choice for developers.
Future of ESP32 Development
The future of ESP32 development looks promising as technology advances. As IoT continues to evolve, the ESP32 is positioned to play a crucial role. With ongoing improvements in performance and new features, the ESP32 will likely integrate more into diverse tech ecosystems.
The burgeoning community and expanding resources promise continuous innovation around the ESP32. This growth signals exciting potential for enhanced functionality and innovative project applications on the horizon.
Espressif Click Boards in Action: Products & Projects
Curious how Espressif technology powers modern IoT solutions? We’ve got you covered.
Explore our selection of Click boards™ developed in partnership with Espressif – featuring modules for Wi-Fi, Bluetooth, cloud connectivity, and more. These compact, reliable boards make it easy to integrate Espressif’s cutting-edge wireless technology into your next project.


EmbeddedWiki Projects
Want to see them in real-world use? Dive into hands-on projects on EmbeddedWiki. Discover how engineers and makers are leveraging Espressif Click boards to build smart devices, automate systems, and bring connected ideas to life. Whether you're looking for inspiration or complete build guides, it's all just a click away.
ABOUT MIKROE
MIKROE is committed to changing the embedded electronics industry through the use of time-saving industry-standard hardware and software solutions. With unique concepts like Remote Access, One New Product/Day, Multi-Architectural IDE and most recently, the EmbeddedWiki™ platform with more than million ready-for-use projects, MIKROE combines its dev boards, compilers, smart displays, programmers/debuggers and 1800+ Click peripheral boards to dramatically cut development time. mikroBUS™; mikroSDK™; SiBRAIN™ and DISCON™ are open standards and mikroBUS only has been adopted by over 100 leading microcontroller companies and integrated on their development boards.
Your MIKROE


